Showing posts with label DIY. Show all posts

Friday, 6 September 2013

A tribute to Hocus Pocus - The Book Necklace

Hocus Pocus is one of my all time favourite films. Ever since I was a kid I have been spellbound by it (See what i did there?)

I have a lot of sisters and we fall into groups of those closest in age. I'm one of the youngest 3, and when we were little we were always called 'The three' or 'You three' so we likened ourselves to the Sanderson sisters whenever we watched Hocus Pocus, I was always Winifred, cos I was the oldest of the 3. 

When I moved into my first flat there was a great set of windows overlooking a large group of messy, wild bushes  weeds underneath. The first time my younger sister came to vist me I hung out the window while she was in the front yard and started shouting. "Boooooook! Book! Come home, or make thyself known!" and we both fell into fits of laughter. So it was only fitting I make a Hocus Pocus piece. 

I wanted to make something 100% original and from the heart and one night when I was trying to sleep it hit me: BOOK. 


I set about carving it the next day. Using polymer clay I started with a basic rectangular shape and then added the details. Doing the stitches was the most painful part as each one had to be made individually.


I was so impressed with how well it came out!


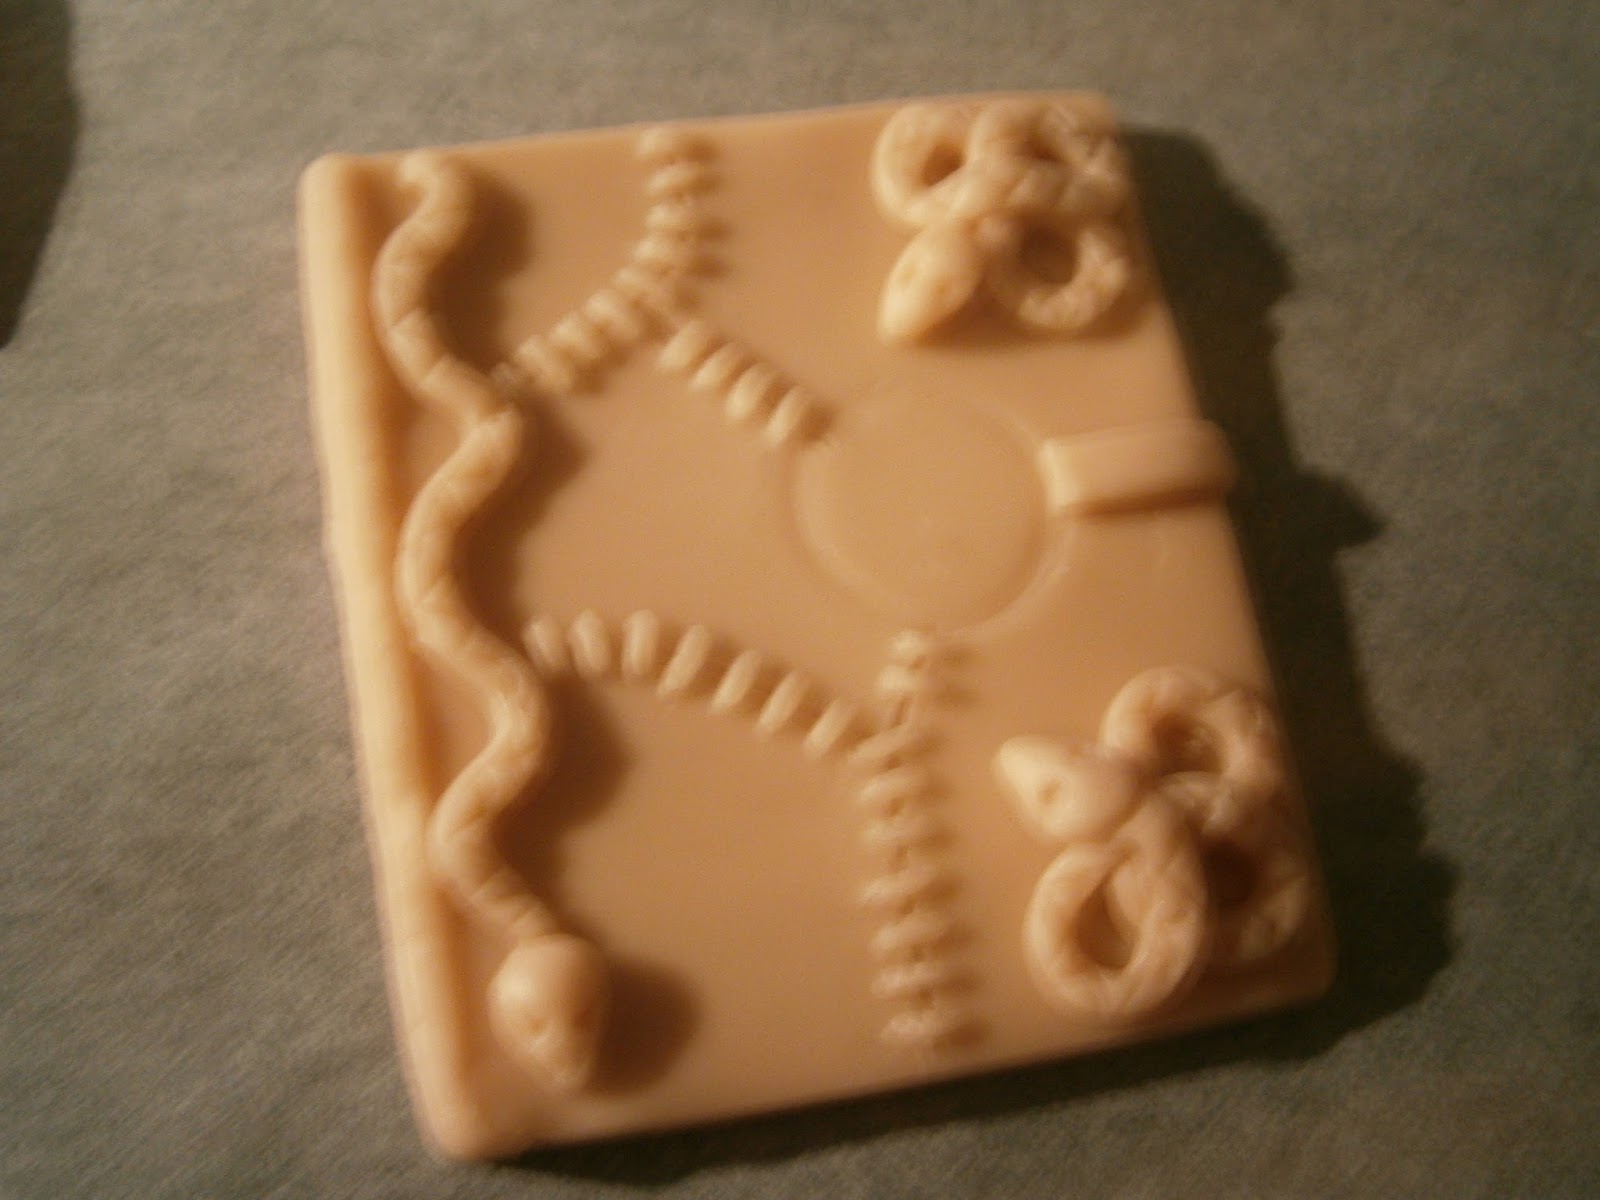
 I do about 4 coats of paint to get the 'withered skin' effect I am after. 


 Once she's dried it can then be varnished with a high gloss sealant and then polished to perfection. How creepy is the eye!!


The only thing I would like to improve on is getting the stitches to come out in greater detail - Sometimes the resin creates a bit of a bubble trying to get into the small spaces where the stitches are, but I think I have found a way to fix this. ;)

Friday, 12 July 2013

Creative Process: Cooking up Resin Brains!

A lot of people have been asking me what the heck I'm talking about when I say I'm moving CC into a new more 'self-sufficient' direction, so I thought I'd put it up in a blog post.

My aim is to be able to create my key jewellery pieces in my home, which is where the self-sufficient part comes from. I also want to make my designs as original as can be, so crafting them completely from scratch is my plan. 

For an example I have chosen my new brain ring design. The first step is really to come up with the idea, but I can't photograph my brain thinkings so we'll start at step 2. 

STEP 2: Once I have an idea I then need to make a positive object. I make mine from polymer clay because its a very work-able product for me to use. This is my 'positive' brain.


STEP 3: Once the polymer clay has been baked, and sealed with a glaze (A process which takes about an hour and a half with baking, cooling, glazing and drying) I then need to make a mold of the positive. I use RTV2 Condensation cured silicone rubber. 


STEP 4: Cast the brain. I use epoxy resin suitable for jewellery castings (and its not too smelly for my little work-room) I tint it a brain-ey pink colour using resin pigment. The resin I use takes about 48 hours to fully set and harden. Its a long process considering I'm quite impatient. 


STEP 5: Is to pop it out of the mold, and then do some finishing touches. I paint the brain with a contrasting pink to bring out the full brainy detail. Once the paint has dried and I'm happy with it, I then sand off any rough edges, and seal the whole brain with two coats of resin finishing spray. (This also takes further drying time)


STEP 6: Is to attach the ring finding. The adhesive I use takes about 24 hours to fully bond, so this is another waiting process. 


 BUT once its dried I have a nice n pretty pink BRAIN ring! Even though I can get impatient with drying and setting times, its worth it in the end to be left with a piece that I have made from scratch to my original design. 


So there you have it! The creative process behind my brain rings. I hope this post shows you just how much work and time is involved in each piece of my new range. 

I'll be doing some more behind the scenes posts like this in the future so please check back if you're keen to see more. 

Sheina, 
The Crypt Keeper.